
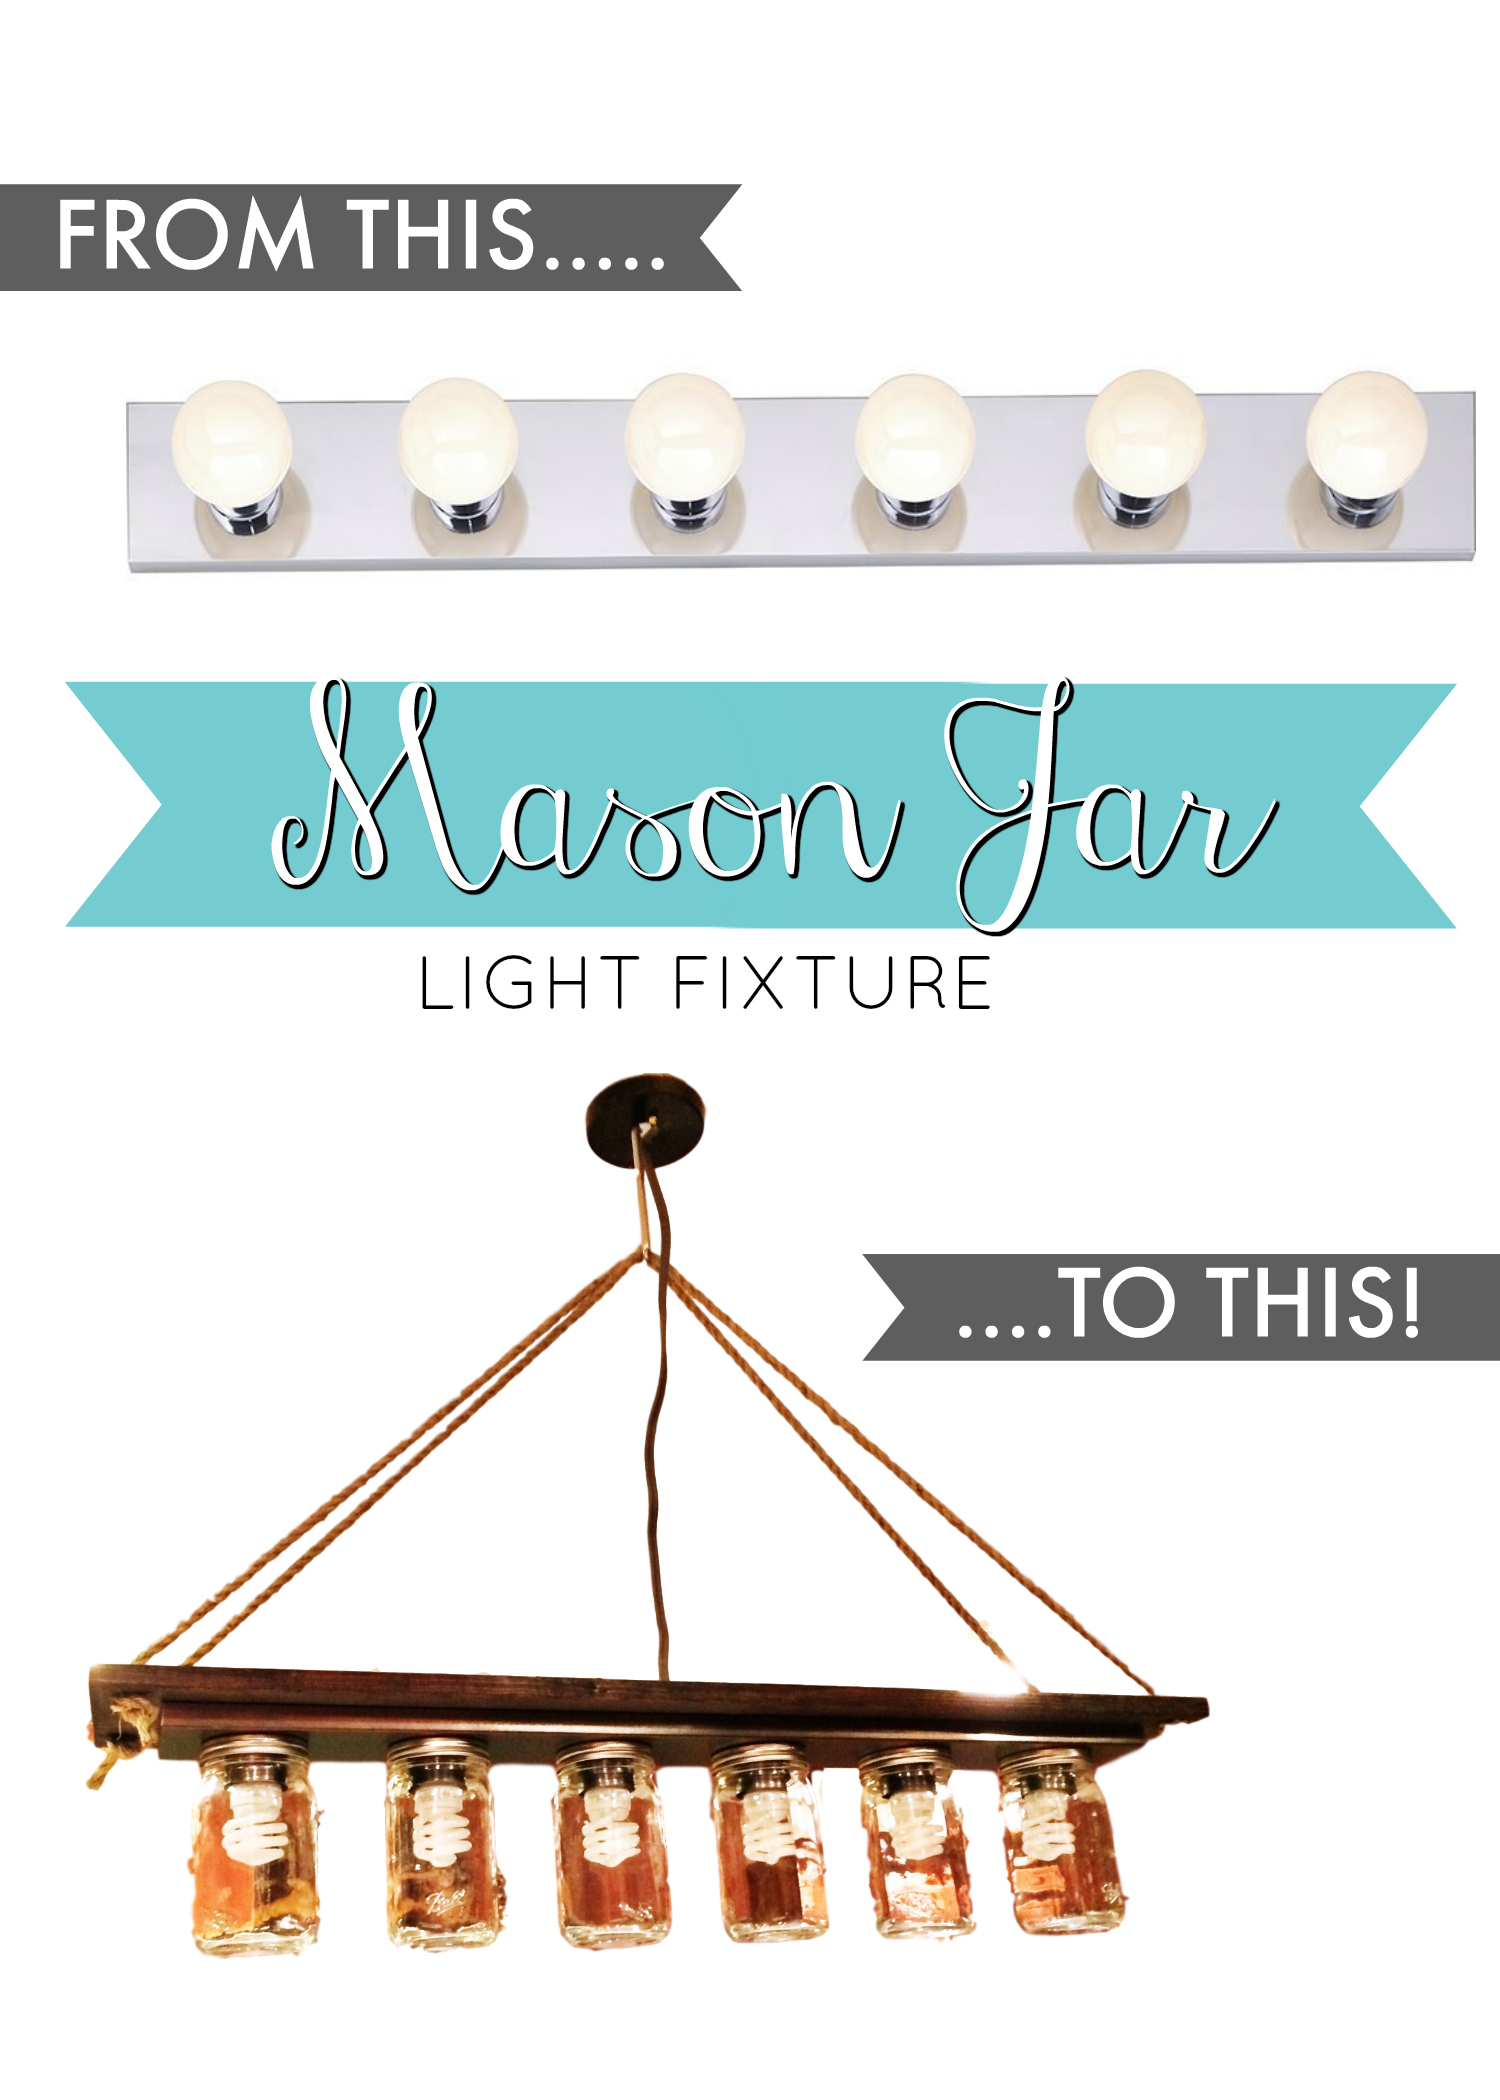
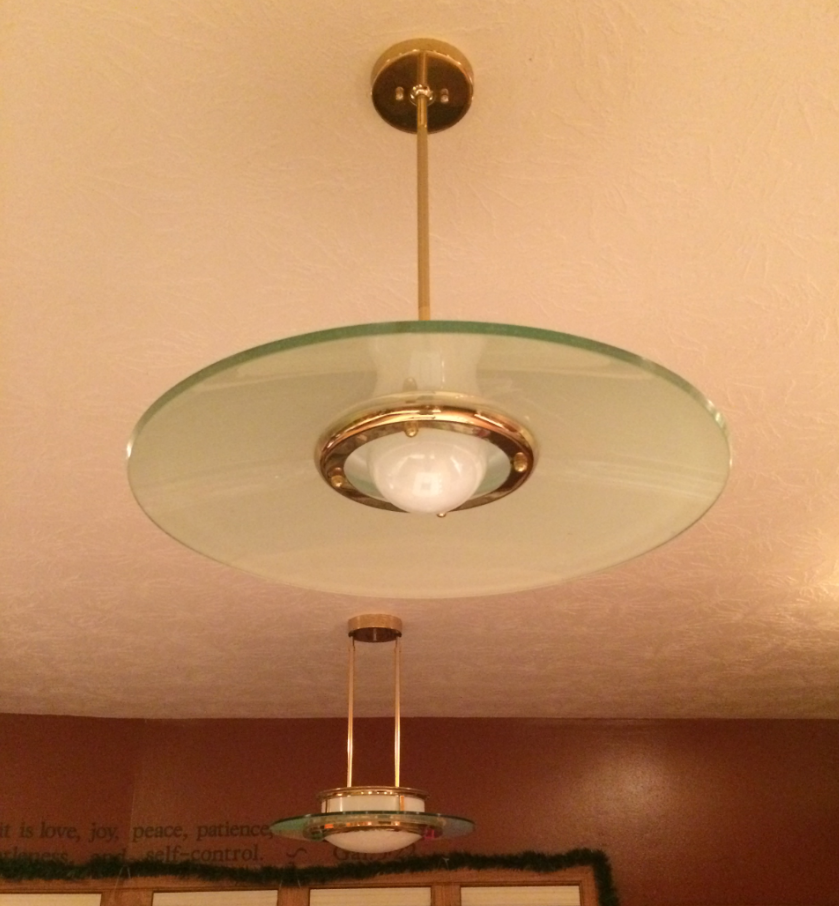
A few weeks ago, my aunt called me to see if I was up for a little home improvement project at her house. She had outdated light fixtures in her kitchen, and wanted to do a little updating. She found a mason jar light fixture on Pinterest and wanted help recreating it!
BEFORE
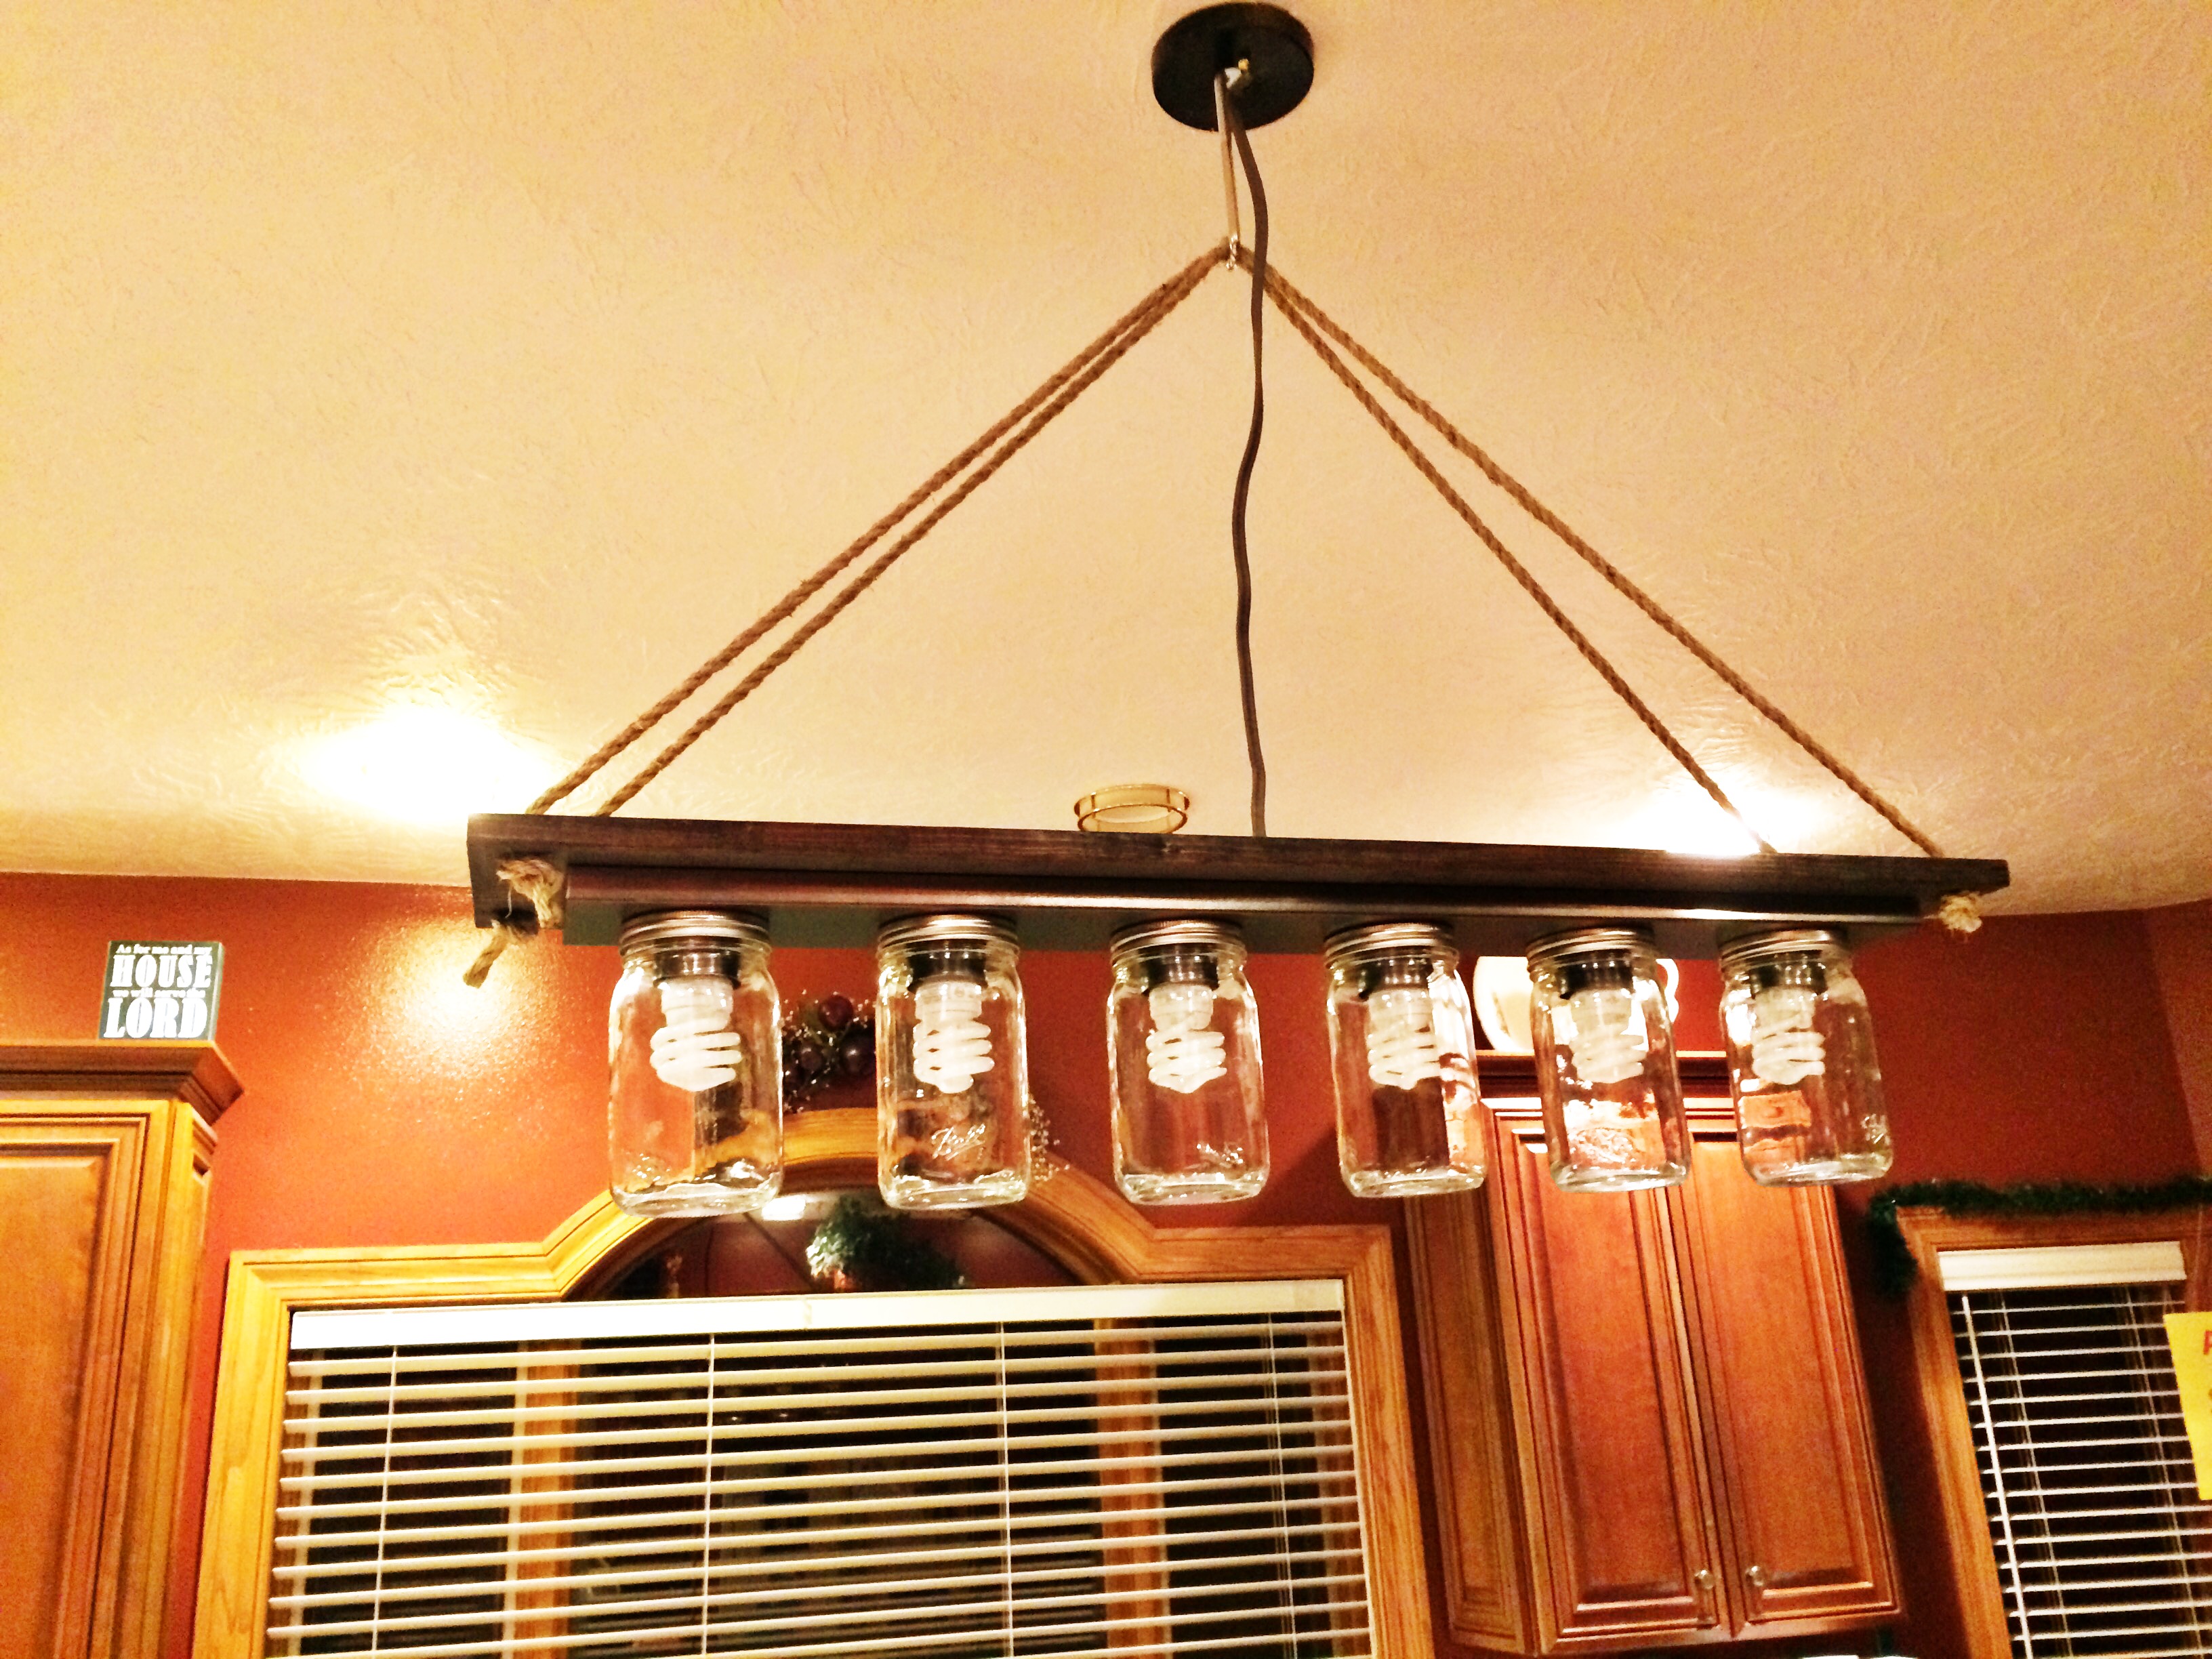
She liked the idea of having something rustic, and since this light fixture is positioned above her kitchen island, she wanted it to be longer. We found a light we liked, and put together some plans on how we were going to do it.
MASON JAR LIGHT FIXTURE MATERIALS
- Vanity light (ordered on Amazon)
- Board (I used a 1 X 8, and cut it to 40 inches, leaving 2 inches on each end of the light)
- Stain (I used dark walnut from Minwax)
- Mason jars, lids and rings (also, 12 small self driving screws to attach lids to light)
- Rope (I used 3/8 inch twine from Menards)
- Lag bolt or screw, depending on how you plan on mounting to the ceiling
- Wire (I used 12 gauge)
- Spray paint (Rustoleum- Oil rubbed bronze)
- Electrical box cover (we reused the one from the old light fixture)


Okay, my biggest weakness when doing projects is remembering to take pictures along the way! But, you can kind of get the idea from the pictures I have here.
STEPS
- Stain your 1 X 8 board.
- I like to let my stained wood dry a couple of days before doing anything with it, so do this ahead of time.
- Spray paint vanity light cover, socket covers, and electrical box cover.
- Attach vanity light base to your board. Make sure you drill a hole where the wires will need to go through to the other side of the board.
- Drill holes for your twine. I went 1 inch in on the corners.
- Drill holes in your mason jar lids, big enough to fit around the light sockets.
- I found the centers of the lids and drilled a hole, and then we used the drill press and a hole punch to make a nice even circle.
- Attach your lids to the cover of the vanity light (make sure your rings are on the lids). I used small, self driving screws and they held very nicely.
- Put the socket covers over the sockets
INSTALLATION OF MASON JAR LIGHT FIXTURE
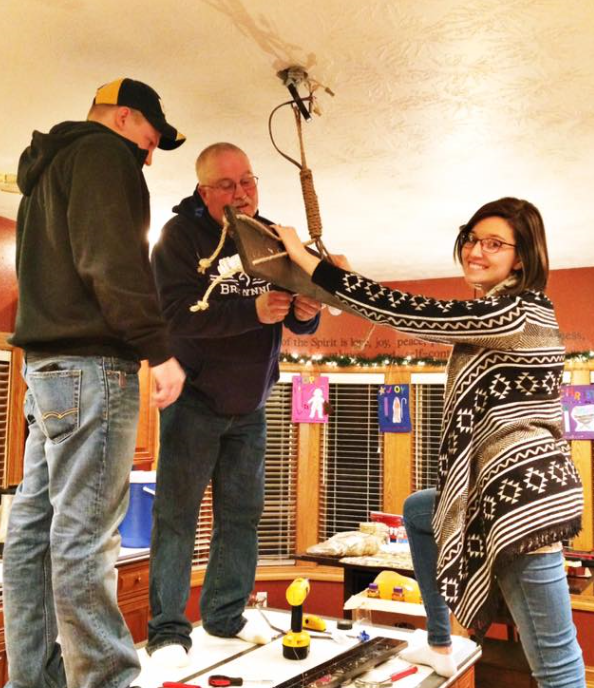
Once you have your light constructed, you are ready to install.
- Measure how much rope you will need. I used roughly 5 feet, and ran it from one corner to the opposite corner (kitty-corner). This will help level and stabilize the light.
- STORY- We originally wanted to do a decorative twist in the center to help hide the wire. BUT, we found when we went to hang it that it was extremely unstable, and would sway when someone walked by. Therefore, we tore that twine off and ran it corner to corner.
- P.S. I did a lot more than just holding the light 🙂 My dad and husband were called in for reinforcements when only 1/2 the light lit up after I wired it. Turns out I just missed one of the wires inside the vanity light. Ooops!
- Anchor your lag bolt or screw. We were able to put the lag bolt directly in the center of the box, but that will depend on what your box is like. Hang your light while you work on the wiring.
- Measure out your wire. We ran our wire directly up the center, but you could run it up the side of the rope if you wanted to hide it a little better. You could also wrap it in twine if you run it up the center, but we left it for now.
- Wire your light.
- Mount your box cover.
AFTER