

Another day, another home project! This past month I had a couple of days off from work, so I took that opportunity to update our farmhouse bathroom closet. When we moved to our house, one thing I found kind of strange is that we didn’t have closet doors (in any of the bedrooms and our bathroom). However, it gave me a little inspiration to make it pretty instead of hiding it behind doors.
FARMHOUSE BATHROOM CLOSET BEFORE:
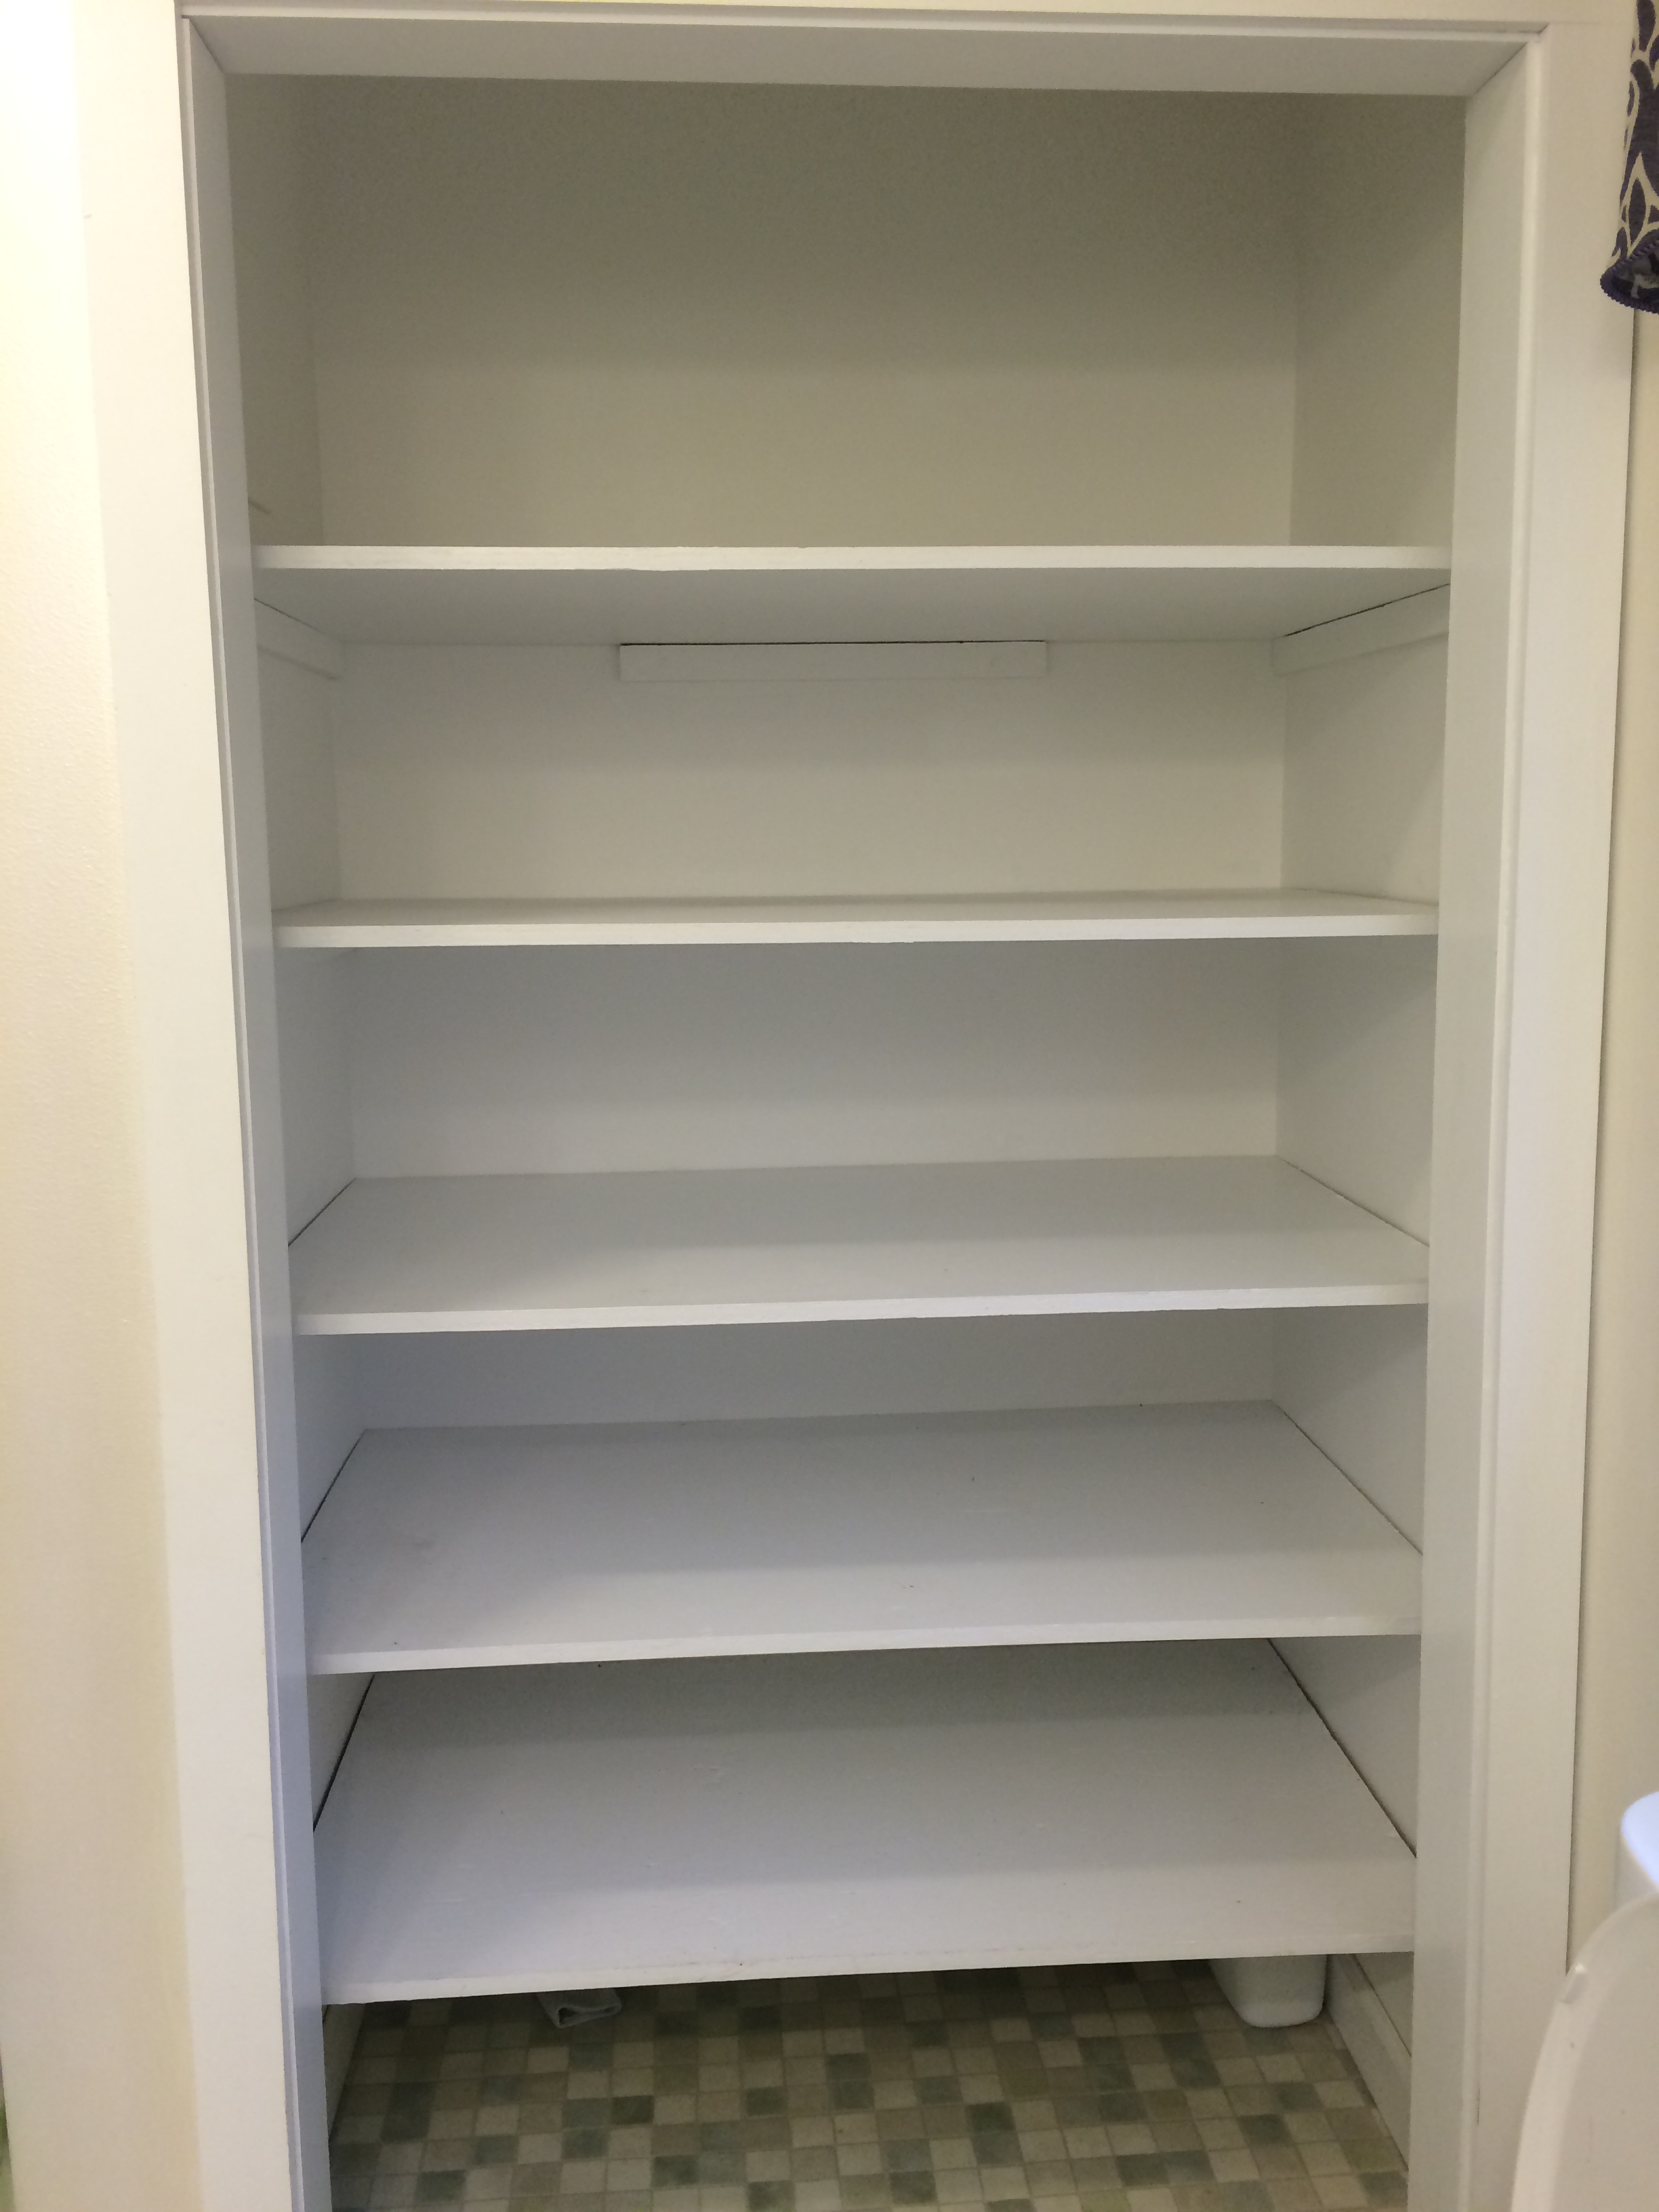
Pretty basic. I like the crispness of the white shelves, however, they get dirty very easily. I use the bottom 2 shelves for laundry baskets, and my husbands clothes aren’t always the cleanest when he comes in from working outside 🙂 . So, I decided to bring a little warmth into the room with some stained shelves, and as far as the walls go, SHIPLAP (there really isn’t any other choice, right?).
THE PROCESS
I like to say that this project took a day, but it does require a little bit of prep work. For starters, I measured out my boards to 47 inches and cut them with a miter saw. I sanded the edges, and then stained them with a dark walnut (I have a LOT of white in my house, so I went with a rather dark stain to add some contrast). I also sealed them with a polyurethane because they will be exposed to moisture in the bathroom. This is a little bit of a time consuming process due to drying, but I worked on it a couple of nights after work and let it dry over night.


SHIPLAPPING
Next up was the shiplap. I usually don’t cut my shiplap ahead of time due to the measurements being different for each piece, but since it was a small space, I cut them and sanded them. This made the installation go super fast (with my hubby’s help, of course!).


When installing your shiplap, make sure that you start a the ceiling and make sure your very first piece is level. Most ceilings, especially in old homes, are not level. If you have a small gap a the top, but don’t worry, you can cover that with trim. I also use a cove trim in the corners to cover any seams in the shiplap.
It was finally time to paint the shiplap and install my shelving. For the shiplap, I used Clark & Kensignton Snowfall in an eggshell finish. I then mounted 1 X 2’s, cut into 29 inch strips to use to hold up my shelves. I was torn between staining them or painting, and ultimately decided on paint to make them blend and the shelves pop! Lastly, I laid my planks in, and secured them with finishing nails. The previous shelved were held down with screws, and that was a little overboard for what these shelves will be used for.


And finally, the finished product! I always start these “1 day projects”, and they turn out taking the entire week :). I couldn’t be happier with how it turned out!
FARMHOUSE BATHROOM CLOSET AFTER
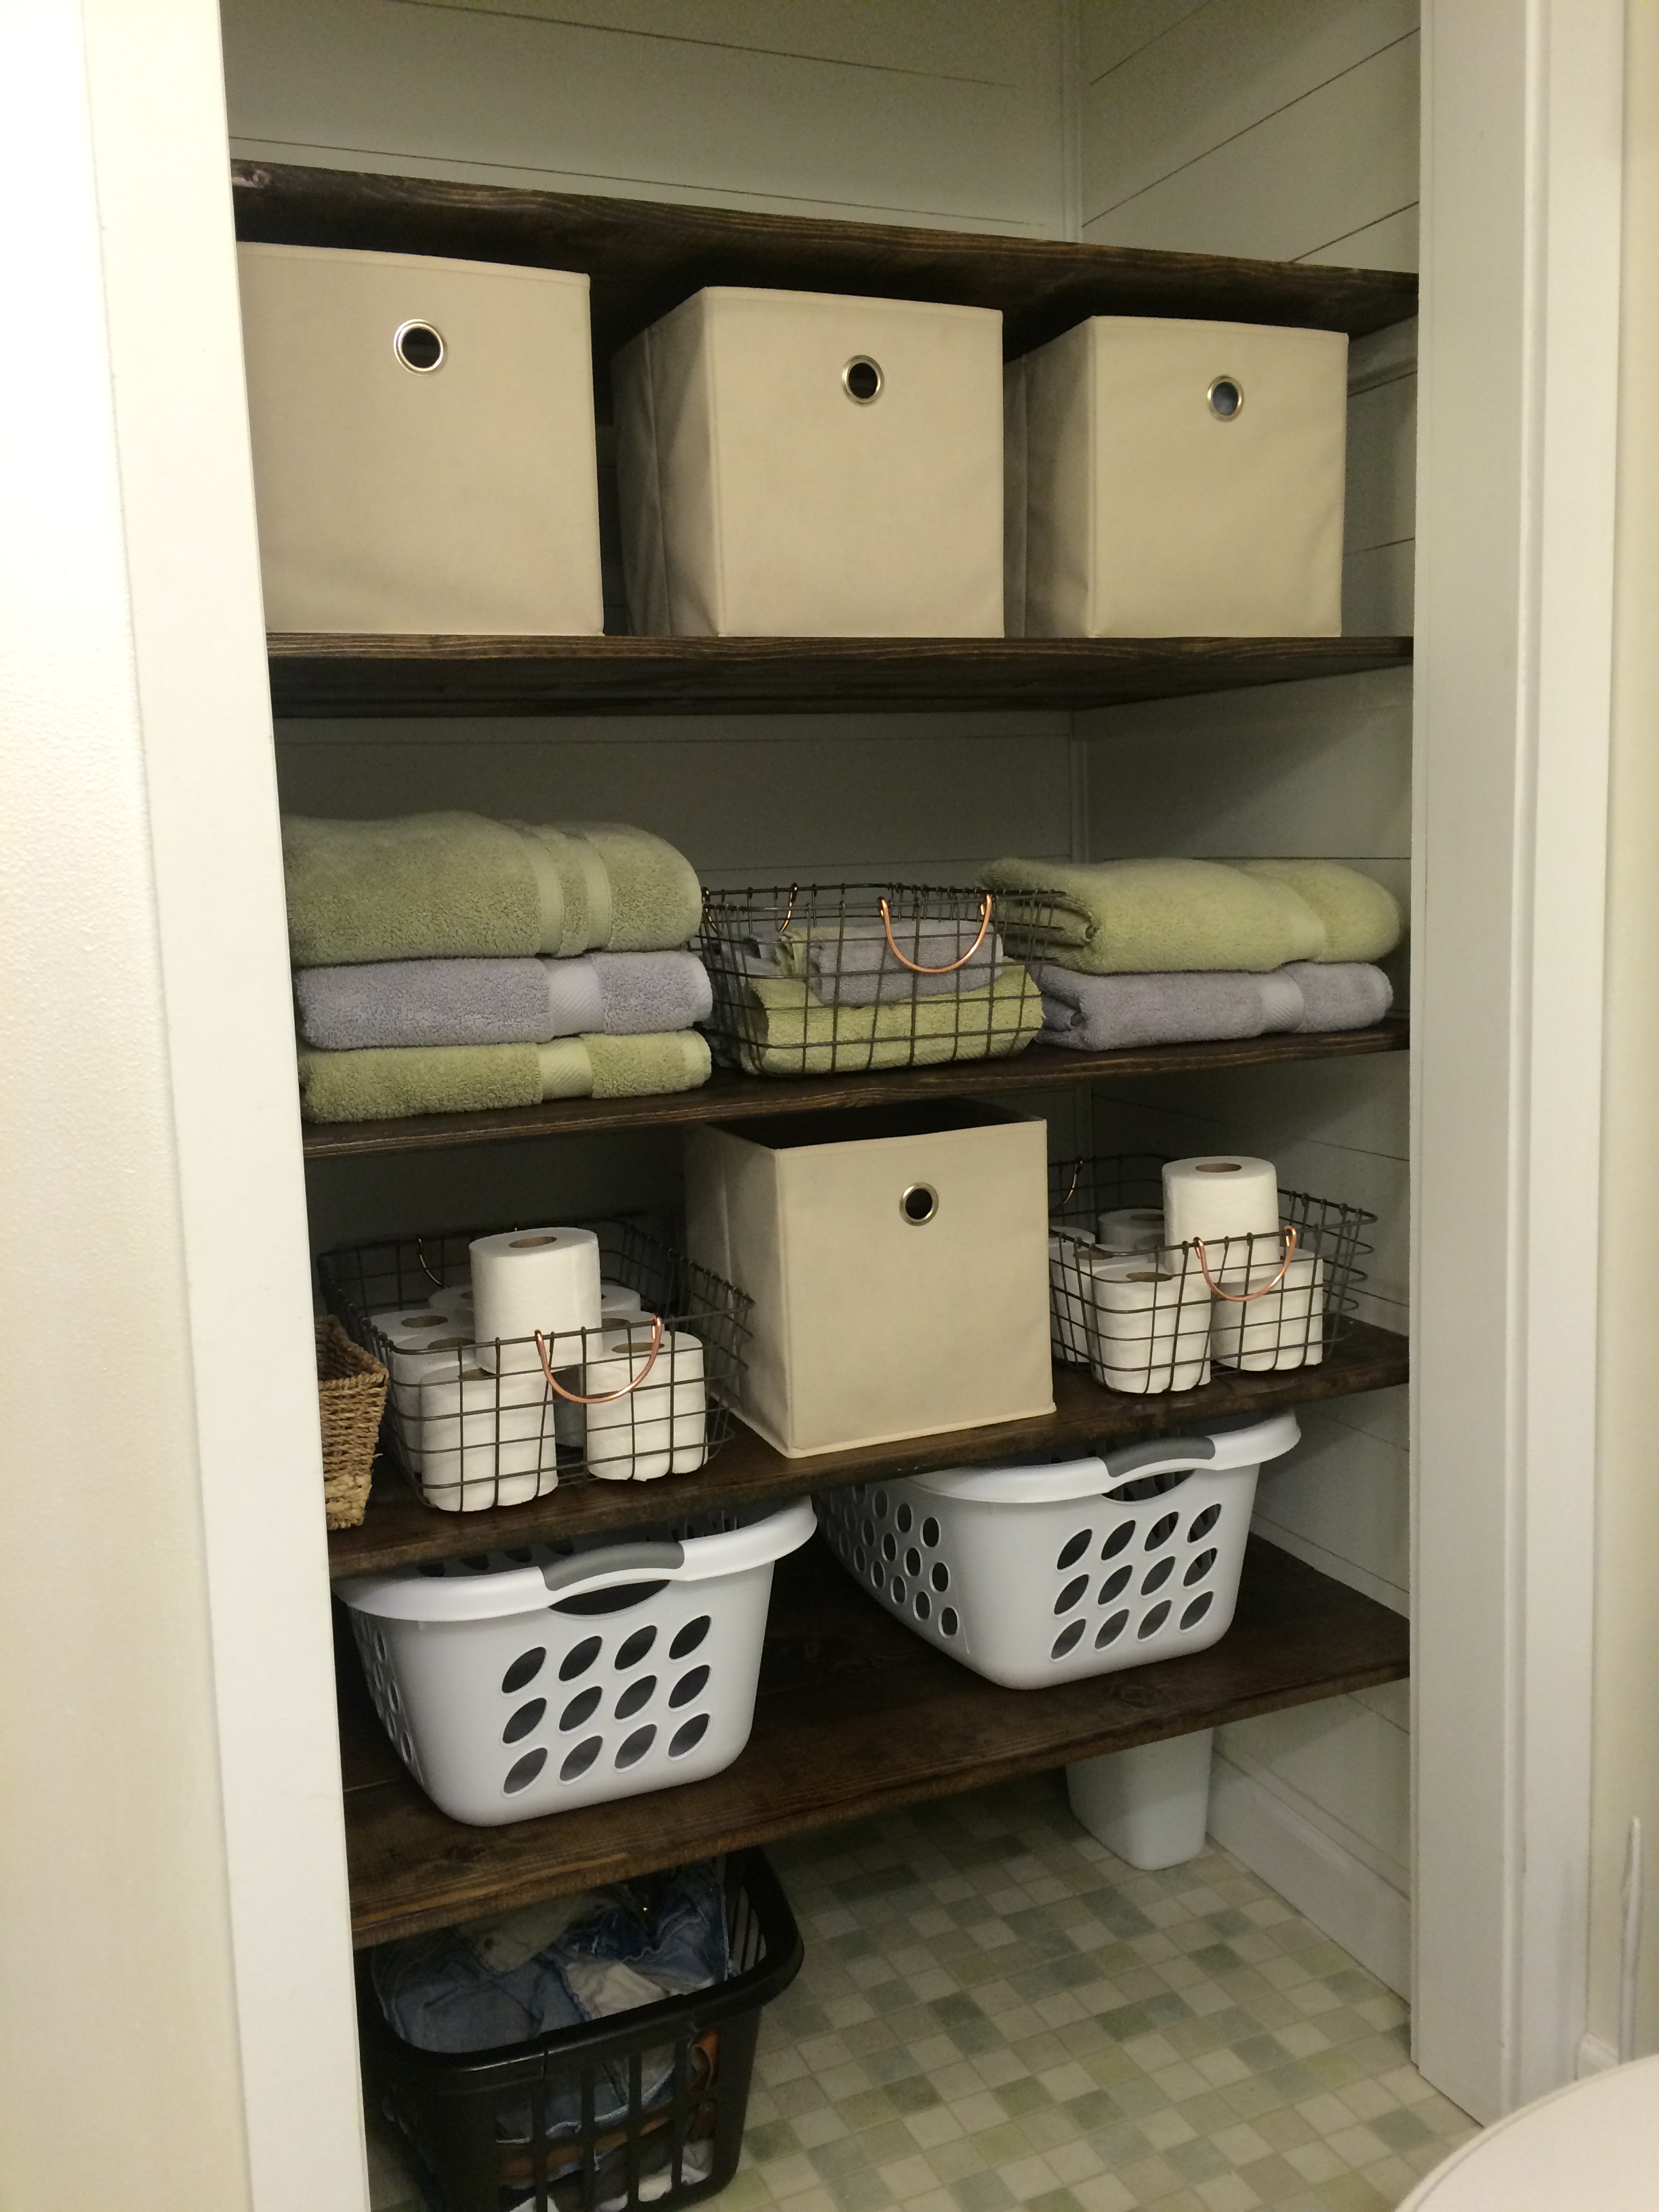
The totes and wire baskets are from Target, and our towels are from Bed, Bath & Beyond. Eventually, I would like to find some wire laundry baskets that are a little more decorative, but for now these do the job.
Next up in the bathroom, PAINT! I just received some sample colors from Magnolia Market, and I am so excited to try them out!


